Tuesday 30 April 2013

SKETCHABILITIES DESIGN TEAM REVEAL #90 BAILEY

http://sketchabilities.blogspot.co.uk/
Morning all and welcome to SKETCHABILITIES DESIGN TEAM SKETCH REVEAL #90.

I hope you like the photo of our puppy, Bailey. He is soooo cute.
Anyway, this is how I put this page together.

I chose all my colours from the photo then chose my papers.
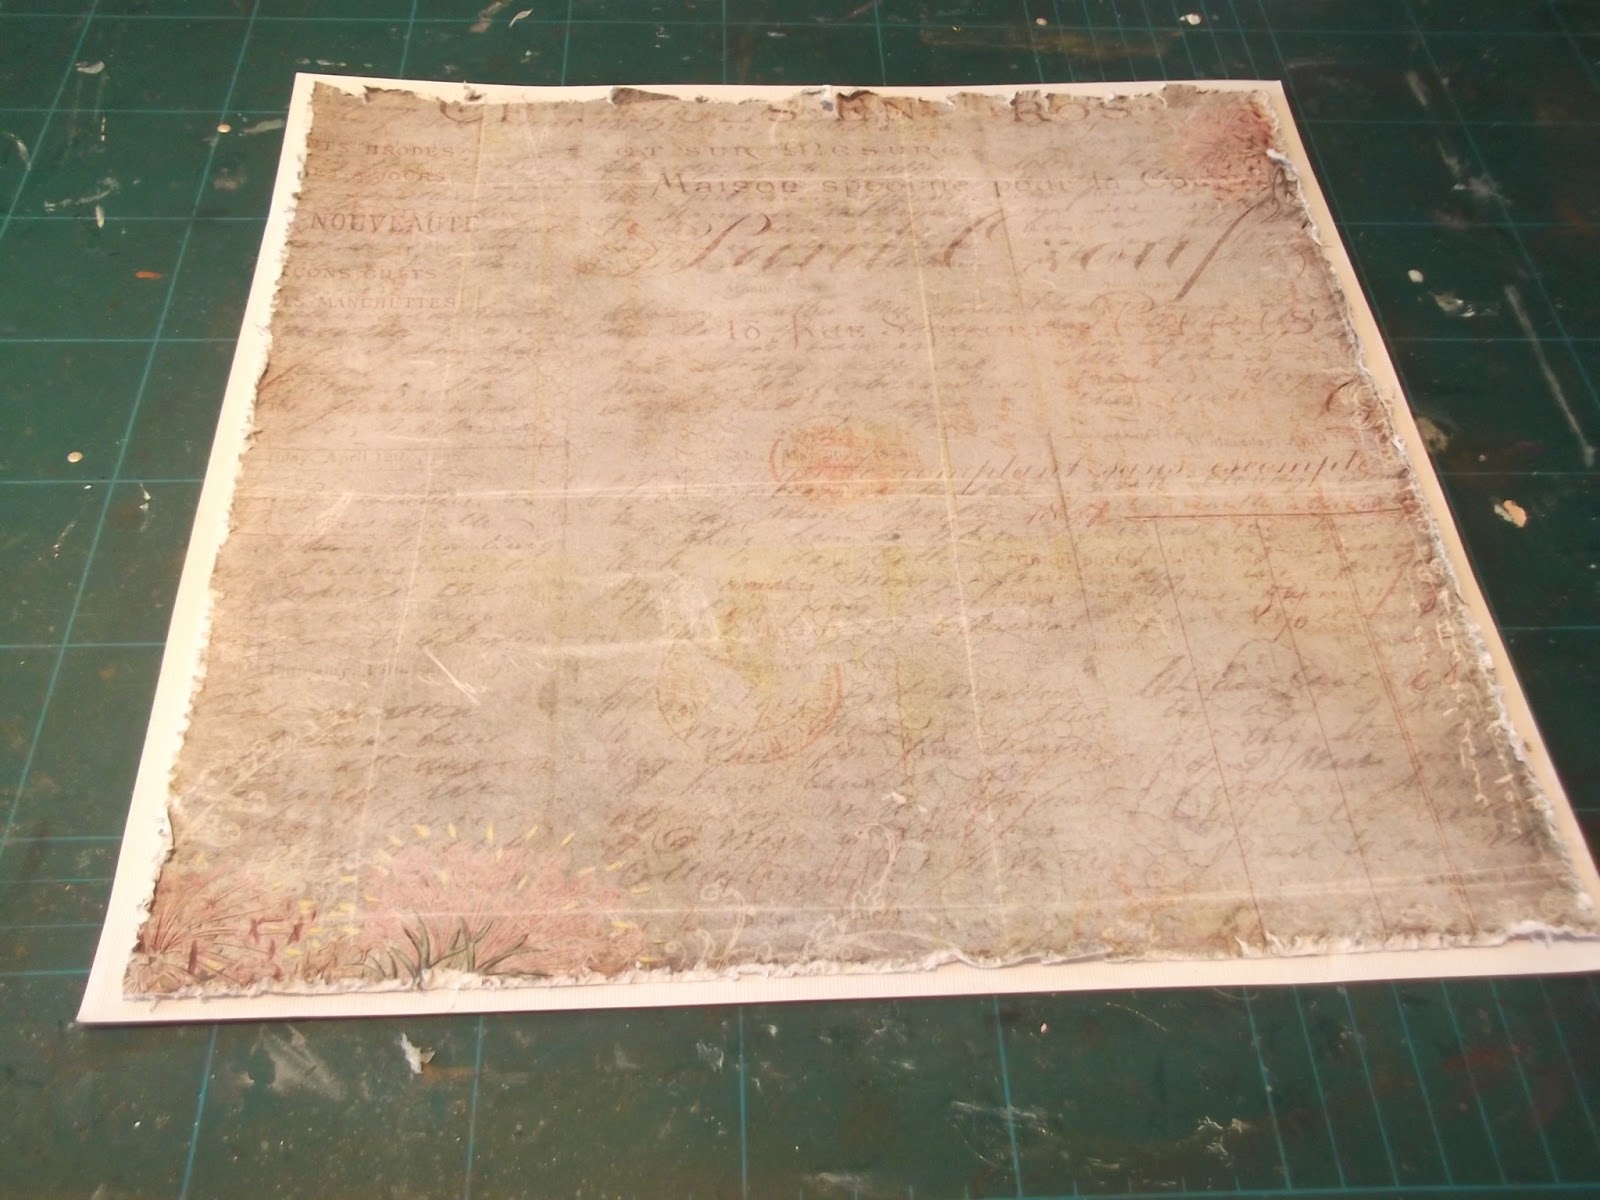
I cut down my pretty background paper to 11 x 11 inches and distressed all the edges.
I cut down the blue background card to 11.5x 11.5 inches and distressed all the edges.
I adhered these to my caramel background cardstock.
I matted my photo three times in  co-ordinating colours (and distressed all the edges).
Then I started to make my layers as per the sketch. I hand cut the three banners, cut the mats, distressed the edges and glued them in place.
I added the photo on top of all the layers.
I tucked  white doilies  underneath.
I then made a little pin tuck in the top left corner using water and pinching. I put a piece of doily in the back and added some mini roses. I repeated this in the opposite corner.
Next I die cut three retro hearts and added some brown ink.
I started to make all my  flowers using mulberry paper and music paper. spiral flower tutorial here
I adhered them all using a heat gun, adding mini roses and assorted flowers as I went.
I cut out a butterfly, added a beaded body beaded pin tutorial here and antennae and added some fuzzy fibres and vine leaves.
I added some sticker alphabets for the title.
And there you have it.
Do go check out all the designers layouts for lots of inspiration and give it a go.

I also entered this into a competition over at scrapforhelp see here http://scrapforhelp.blogspot.co.uk/

PRIZE
To win a pack of flowers, just leave me a comment to let me know that you have become a follower and I will pick a winner at the end of the challenge.

SCRAPPY STASH
Plain cardstock
Pretty papers
White doilies
Cardboard
Assorted flowers and leaves
Butterflies
Beaded pin
Pearls
Mini roses
Fuzzy fibres
Retro heart dies
Alpha stickers
Brown ink
Distressing tool (Prima)

Friday 26 April 2013

STUCK ON YOU SKETCHES DESIGN TEAM SKETCH REVEAL - 26TH April

 
http://stuckonusketches.blogspot.co.uk/
 
Hi everyone and welcome to the STUCK ON U SKETCHES design team SKETCH reveal.
I also entered this into a challenge over at Scrap for Help here http://scrapforhelp.blogspot.co.uk/

THIS IS HOW I DID IT.
I love using lots of layers so loved this sketch and really had fun with it.
I chose the colours from the photo, using mainly pale green, then added a little orange and yellow, beige etc.
I matted my photo onto a doily, then onto some pale green cardstock.
I used the same pale green for the background and cut it to 11.5x11.5 inches and adhered to white cardstock.
I then cut down some beige cardstock to10.5 x 9.5inches and distressed the edges and placed this on top.
I took a piece of pretty dotty green paper and ripped the edges to fit on top of the beige card, ripped to 10 x 9 inches. Then inked the edges.
Next I added a piece of cardboard that I inked.
Then I added a doily.
Then another piece of ripped pretty paper, then another piece of ripped paper.
I then cut out a circle using deckle edge scissors and inked the edges.
I glued all these layers down and added my photo.
Now - decorate!!!
I added lots of assorted flowers and branches,  a die cut dragonfly with a beaded body and a piece of driftwood from the beach.
I then made the three banners and inked the edges, added some flowers and a branch and made the title.
I HOPE YOU LIKE IT AND GIVE IT A GO.
Plus do check out all the other designers blogs for some more inspiration.

PRIZE
If you would like to be in with a chance to win a bag of mixed  flowers, do please become a follower, leave me a comment to let me know, and I will pick a winner at the end of the challenge.
Have fun.

SCRAPPY STASH
Plain cardstock
Pretty papers by My Minds Eye
Cardboard
Brown chalk ink
Deckle edges scissors
Rectangular doilies
Driftwood
Assorted flowers
Branch punches
Pearls
Dragonfly die by sizzix
Beaded pin
Alphabet die by sizzix.

Tuesday 23 April 2013

LUNCH


Morning all,
For this layout I have used a sketch from C'est Magnifique Kits  - http://cestmagnifiquekits.blogspot.co.uk/


This is how I put this layout together.
I chose the apricot  colour from Jessies top and added pink and cream.
I first cut out some brown cardstock to 10x10 inches and distressed the edges.
I adhered this to my background apricot cardstock.
I then cut down my pretty Prima paper to just under 10x10 inches using deckle edge scissors, and inked the edges.
I then cut this paper in half. I used a water mister bottle and misted the free edges with water so as to be able to manipulate the paper. I made a few tucks on all four edges, top and bottom and dried with my heat gun.
I then glued this down and added sewn on buttons and some white cord.
I then double matted my photos and added these.
I added a small white doily, some painted white cardboard, some hessian/burlap, and two journaling blocks all around the photos.
I then started to decorate with assorted flowers.
I made three butterflies and beaded pins and added these.
I made a little air- dry foam bird. I inked the body and added a small black eye.
I added a small key with ribbon, pearls and fibre.
I made some pearl and bud sprays and glued these down.
I then added a little bow above my three buttons and added the title.
Hope you like it and give it a go.

SCRAPPY STASH
Plain cardstock
Prima paper, natures garden
Prima journaling block
Cardboard and white paint
Brown ink
Pink buttons
White cord
Butterflies
Beaded pins
Pearl and rose bud sprays
Martha Stewart air-dry clay kit, for the bird
Mini roses
Mulberry paper to make the flowers
Key
String pearls
Funky fibres in white
Rayon ribbon
White doily
Itty bitty flower die by Donna Salazar
Deckle edge scissors
Scallop edge scissors for some of the flowers
Rose flower die by Donna Salazar

For tutorial on the small flowers see here http://theprettypaperpatisserie.blogspot.co.uk/2013/03/hand-made-flowers-tutorial.html
For beaded pin tutorial see here
http://theprettypaperpatisserie.blogspot.co.uk/2012/06/hand-made-stick-pins.html

HAPPY SCRAPPING


Monday 22 April 2013

WINNER - SOUS MARCH 29TH SKETCH

Morning all, I have a winner for you. Sorry for the delay, but I have been in bed with flu for the past week. So,  SANDRA,  please email me with your address and I  will send you out a package of blue flowers.        pac.wright@ntlworld.com
Have a great day everyone. Bye For Now x

Monday 15 April 2013

SKETCHABILITIES DESIGN TEAM REVEAL - SKETCH #89

Hi everyone and welcome to SKETCHABILITIES SKETCH # 89.
I also entered this into a challenge over at Berry 71 Bleu - Flowers here http://berry71bleu.blogspot.ca/2013/04/april-challenge-flowers.html

I just loved this sketch and had great fun with all the layers.
To see MY BUILD A PAGE scroll down a bit.
This is how I put my page together.
First of all I chose my colours and papers.
Then I cut down my pretty paper to 11.5x11.5 inches and distressed all the edges.
I adhered this to my background cardstock.
I then added a large doily.
I  matted my photo twice in co-ordinating colours.
Then I started to layer up. I distressed all my layers and added some white paint to the cardboard.
Next I made my banners in cardboard, painted them and matted them.
I adhered these down, and started to decorate with my flowers etc.
I made lots of little flowers using my spiral method (see tutorial) SPIRAL FLOWERS HERE and made a few larger ones using some dies.
I made two medium size butterflies, stickled and inked them (see tutorial below), then using a hot glue gun, stuck them down.
I added some die cut branches, some fuzzy fibres and the die cut title.
Do go and check out all the other designers work for lots of inspiration.
Hope you like it and give it a go.

SCRAPPY STASH
Plain cardstock
Pretty paper by Prima - Nature Garden Collection
Caramel pretty paper by Basic Grey
White doily
Cardboard
White paint
Fuzzy fibres in white
Branch die by Sizzix
Butterflies using modelling paste, wire, stickles, ink and template
Assorted papers for flowers
Donna Salazar spellbinders Rose Creations die and Itty Blossoms die
Alpha die by Sizzix

HAND MADE BUTTERFLIES
Make a template by drawing around a butterfly you already have, I used a Prima one.
Cut out and ink the edges. Add stickles glitter glue.
Make a body using modelling clay, add stickles.
Take some wire, I used some cut from some mini roses on stems which I painted white.
Make antennae from the wire, glue to the reverse and there you have a pretty butterfly.

BAILEY BUILD A PAGE

take a pretty paper and cut off a half an inch all round. Distress the edges. Adhere to background card.
Add a doily.
Take another piece of card and distress the edges.
Repeat but cut down a little smaller.
Add another piece.

Add a mat to this.
Add your double matted photo.
Add a distressed border.
Add a layer to the border.
Add a scalloped border.
Add all the matted banners.
Add the title.

Add your flowers.

Add some branches.
Add butterflies.
 
PRIZE
Hope you enjoyed my tutorial and if you would like to win a pack of spiral flowers, just become a follower and leave me a comment to say so, then I will pick a winner at the end of the sketch challenge.

Friday 12 April 2013

SOUS DESIGN TEAM REVEAL - 12 April


http://stuckonusketches.blogspot.co.uk/


WELCOME TO STUCK ON U SKETCHES DESIGN TEAM SKETCH REVEAL.

If you like doing double page layouts then this one is for you.
Do check out all the designers blogs for lots of inspiration.
This is how I put these pages together.
 
First of all I chose my colour scheme from the photo.
I used cream for my background cardstock.
Then  I added scalloped caramel cardstock on both pages.
 I matted my photos, and inked the edges with brown ink.
Next I started to cut out my layers as per the sketch.
Once the layers were down I added some white painted cardboard to the top and bottom edges on both pages.
I then added my matted and inked photos.
Next I started to decorate.
I used a Martha Stewart scallop shell punch and a shell punch from EK Success for the shells.
I added lots of bits and pieces to these pages including flowers, pearls, real shells, a piece of driftwood, stick pins, butterflies, buttons, clock face, and muslin. I also added a couple of die cut swirls and  die cut sign hangers that I painted, crackled and inked.
I hope you like it and have a look round all the designers blogs for inspiration and give it a go.
Have fun. Bye for Now. x

PRIZE
If you would like to win a pack of  scrappy bits and pieces, please become a follower and leave me a comment to say so, and I will pick a winner at the end of the challenge.
 
SCRAPPY STASH
Plain cardstock
Pretty papers
Cardboard
Scalloped scissors
Brown chalk ink
White paint
Martha stewart shell punch
EK Success shell punch
Flowers
Pearls
Shells picked up from the beach
Driftwood picked u from the beach
Muslin
Tim Holtz hanging sign die
Crackle paint
Sizzix swirl die
Prima clock face
Buttons
Lace
Stick pins
Butterfly die
Alphabet die.

Wednesday 10 April 2013

SO HAPPY

Morning all. Here is my latest layout using a sketch from SCRAP THAT  for my inspiration.
http://scrapthat.ning.com/forum/topics/april-within-nature-kit-sketch-challenge
I also entered this into a challenge over at Scrap for help http://www.scrapforhelp.blogspot.co.uk/.


I made lots of flowers for this layout spiral flower tutorial here .

So first of all I cut down some pink cardstock to 11.5x11.5 inches and adhered onto black card.
I then cut down some Prima pretty paperto 10.5x10.5inches and distressed the edges.
I ripped the paper in three places as per the sketch, distressed the edges and added mini roses. I adhered this and added some book paper in the back of the tears.
I then stitched all around the edge on my machine.
I double matted my photo and adhered this.
I added a doily in the back and started cutting out some border strips.
I added these as per the sketch and started to decorate using my spiral flowers.
I also made two larger flowers from book paper and spellbinders dies.
I made some small bunches of flowers using pearls and buds and added a small ribbon.
Next I added the title and date. I adhered all my flowers using a heat gun.
Hope you like it and play along.
See you next time. Happy Scrapping.x

SCRAPPY STASH
Plain cardstock
Pretty paper - Prima
White doily
Book paper
Scallop scissors and ruler
Pearl sprays
Assorted flowers and buds
Pink ribbon to make a bow
Title Sticker
Sewing machine
Distressing tool
Heat gun

Tuesday 9 April 2013

HOMEMADE TEXTURE PASTE

HOMEMADE WHITE TEXTURE PASTE

You will need,


An airtight container
One wooden spoon to mix
2 tablespoons of white acrylic paint
2 tablespoons of white PVA glue
2 tablespoons of talcum powder or
2 tablespoons of baking soda for a thicker mix
Method
Start with the paint and stir and add each ingredient one by one.
Make sure you keep it in an airtight container.
If you want a thinner mixture just add a little water.
To make it thicker, add more talc or baking soda.
Bye for now

CARD USING PRIMA PAPERS

Morning lovely scrappers. Another card for today, using Prima Nature Garden collection.
I just layered up with different layers, added ribbon and flowers and pearls and added a box for my sentiment to go in. Hope you like it. Bye For Now.

Friday 5 April 2013

EXPLORE


Happy Friday everyone.
Today I have just finished a layout for a challenge over at  Scrap For Help,-
http://scrapforhelp.blogspot.co.uk/
The challenge was to use book pages. Here I have used three different book pages.
I have also entered this into a challenge at http://flyingunicornforums.com/forum/topic/1861
This is how I did it.
I chose my papers and embellies first, I kept to natural colours from the photo.
I cut 1inch from my pretty paper (11ins x 11 ins) and distressed the edges.
I matted my photo and inked the edges.
I started layering my papers with a page of music paper, then a doily, hessian/burlap, word paper, then tucked some inked cardboard into the two opposite corners.
I then tore out the three V sections and inked the edges then glued in some book paper in the back.
Now time to decorate.
I chose a mix of hand made and bought assorted flowers, green gems, butterflies, a leaf and mini roses.
I love mini roses. I adhered all these with a hot glue gun.
I added a piece of lace draped between some mini roses.
And then I added a die cut title.
Hope you like it and give it a go.
Bye for now. x

SCRAPPY STASH
Plain cardstock
Bo Bunny Little Miss pretty paper
Music and words book pages
Green chalk ink
Assorted flowers
Green sparkly gems
Butterfly die
Cardboard
Alpha large letter dies
Hessian/Burlap
Rectangle doily
Piece of cream lace
Leaf punch

CARD USING PRIMA NATURE GARDEN COLLECTION

Heres another card using Prima papers. Just love their papers.
Here I have also attached some of their flower packaging (the plastic doily) and added some hand made mulberry flowers.
The ribbon is some binding that has been inked.
Happy crafting. x

Thursday 4 April 2013

CARDS USING PRIMAS NATURE GARDEN

Hi everyone, as it is soooo cold I thought I would keep myself busy by making some cards for a change. Here is the first one using Primas Nature Garden collection. I have kept the journaling card blank for now so that I can fill with a sentiment when needed. Hope you like it. Come back tomorrow for another one. Bye For Now. x

WE HAVE A WINNER

CONGRATULATIONS - I have a winner from the sketchabilities design team sketch #87 reveal.
TRACEY - please email me with your address to receive your happy mail.
pac.wright@ntlworld.com
Bye for now.